🎵 MaGeSY® R-EVOLUTiON™⭐⭐⭐

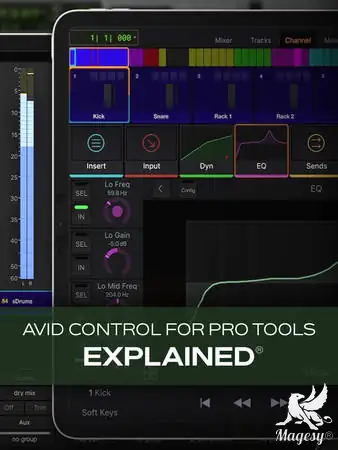
  • AViD Control for Pro Tools Explained TUTORiAL-HiDERA-MaGeSY

    AViD Control for Pro Tools

    HiDERA | 7 December 2025 | 390 MB

    Studio pro Doug Zangar presents in-depth AVID Control video tutorials! Learn everything you need to know to use the free iOS AVID Control app to control your Pro Tools sessions, including mix and edit windows, transport controls, writing automation, toggling folders open and closed, keyboard shortcuts and more. These videos are designed for both new and intermediate AVID Control users. Doug greets you and starts at the beginning with how to find the free iOS app on Apple’s App Store, and the free Eucon Control software download on AVID’s website, and how to install them correctly. Once that’s done, you’ll then get a detailed overview of the AVID Control interface, as well as how to customize its look and feel via its many settings. Doug then goes through all the different available pages throughly, including the Mixer View, Tracks View, Channel View, Meters View, and Soft Keys, showing what they do and how to use them effectively in your Pro Tools sessions. Not stopping there, you’ll watch and see how to toggle folders open and closed in Mixer view, Tracks view, and with Soft Keys, as well as how to arm and record multiple tracks with AVID Control, and record volume, pan and send gain automation using AVID Control as the controller.


    Viewed 4006 By Music Producers & DJ´s.


  • Cubase 15 Update Explained TUTORiAL-HiDERA
    December 8th, 2025 ⚡
    Categories:

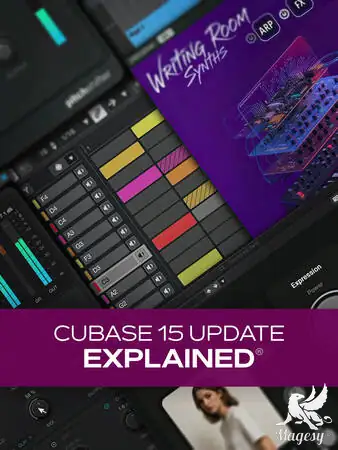
    Cubase 15 Update Explained TUTORiAL-HiDERA-MaGeSY

    Cubase 15 Update Explained®

    HiDERA | 08 December 2025 | 313 MB

    Across the series, you’ll see how the redesigned Start Page Hub speeds up the setup process, how the workflow improvements streamline mixing and exporting, and how powerful new creative tools — like the Melodic Pattern Editor, Wavefold/Random/S&H modulators, and the revamped Automation system — open the door to faster and more musical production. Gary also dives into Cubase’s newest instruments and processors, including Writing Room Synths, the PitchShifter effect, the new UltraShaper dynamics tool, and the Groove Agent SE6 update with its expanded kits, effects, and pattern tools. You’ll also learn how to take advantage of Cubase 15’s improved Expression Map Editor, explore the Omnivocal Beta AI-powered vocal synthesis engine, and get hands-on with the expanded content libraries, new Sampler Track functions, and enhanced Plugin Manager features. By the end, you’ll have a complete understanding of what’s new in Cubase 15 and how these updates can dramatically improve your speed, creativity, and sonic control.


    Viewed 7858 By Music Producers & DJ´s.


  • Moog Mother 32 Explained and Explored TUTORiAL-SYNTHiC4TE-MaGeSY

    Moog Mother 32 Explained & Explored

    SYNTHiC4TE | 23 March 2016 | 549 MB

    Modular synths are back… and here to stay. And Rishabh Rajan is here to teach us all about the Moog Mother 32! So learn the Moog and modular synthesis at the same time in this wonderfully produced two-for-one course! We love modular synthesis. Where else can you have such absolute control over every aspect of your sounds? With all the new interest in Eurorack, we’ve decided to dive into synthesis big time. That’s why we’re excited to bring you this truly great course by our esteemed synth trainer, Rishabh Rajan!


    Viewed 26735 By Music Producers & DJ´s.


  • Logic Pro for the Virtual Composer Explained TUTORiAL-HiDERA-MaGeSY

    Logic Pro for the Virtual Composer

    HiDERA | 26 January 2025 | 236 MB

    Logic Pro expert Stephen O’Connell presents a highly informative Logic Pro video course dedicated specifically to Logic Pro users composing primarily with MIDI instruments. Not only will you learn techniques for easing the burden on your CPU when dealing with resource-intensive VIs, but you will also discover plenty of other helpful tips, such as working with multi-timbral instruments, signal flow routing, resampling sounds, and much more, all of which will greatly improve your workflow. These videos are designed for intermediate Logic Pro users who work with predominantly virtual instruments on a regular basis. Stephen begins with a brief overview of everything that will be covered in this course and then gets right down to business, examining how Logic Pro handles CPU resources and illustrating various ways to maximize your resources in this regard. You’ll also learn how to freeze or disable tracks that aren’t being readily worked on, which will lighten the load considerably (especially in larger sessions), and how to optimize your system for running third-party MIDI libraries. Next, Stephen will show you how to start up Logic Pro without the core audio driver. This is helpful when trying to deal with projects that won’t open correctly or possibly contain corrupted data, etc. This is followed by a demonstration on how to resample sounds from a library when you only need a few notes or phrases, thereby freeing up valuable CPU resources for the other more heavily used instruments.


    Viewed 59517 By Music Producers & DJ´s.


  • Layering And Filling Sounds Explained TUTORiAL-HiDERA-MaGeSY

    Layering & Filling Sounds

    HiDERA | 26 January 2025 | 229 MB

    Are you tired of feeling that your tracks sound a bit dull and lifeless? Don’t you wish there was a way you could make them sound … well … bigger and better? You’ve come to the right place! In this video course, production expert Thomas Cochran will show you numerous ways to convert a stale, anemic-sounding instrument to something that commands attention and turns an ear. With the sound-layering techniques you learn in this tutorial, you’ll never have to settle for a lackluster track again! These videos are designed for producers and recordists that want to increase the impact and vibe of their instrument tracks. After welcoming you to the production course, Thomas begins showing you ways to add texture and movement to sounds, lending complexity to your production without adding clutter. This is done through bit reduction, adding saturation to reverb, and layering a granular synth patch on top of a simple sine keys part. Thomas then shows how you can add depth to a track with modulation and delay effects, which is useful for filling up space without adding another instrument. Next, you’ll discover how duplicating instrument parts (melodies, chords, etc.) with another sound (or more) can greatly increase the depth and texture of an existing part. The great thing about this technique is that virtually any sound is fair play, as they will all complement the original track in a unique way.


    Viewed 64902 By Music Producers & DJ´s.


  • Pro Tools Programming Realistic Drums Explained TUTORiAL-HiDERA-MaGeSY

    Pro Tools: Programming Realistic Drums

    HiDERA | 13 July 2025 | 349 MB

    If you’re tired of dealing with the hassle of finding a good drummer and/or trying to record great-sounding drums, this course is for you! Pro Tools guru Thomas Cochran will show you how to get professional-sounding drum tracks in Pro Tools – all without miking a single drum! You’ll learn all about programming beats, patterns, and fills, including plenty of techniques for added realism, as well as tips on MIDI editing, processing, and mixing. After this drum programming course is through, you’ll be ready to add a killer drum track to your very next song using everything you’ve learned. These drum programming videos are designed for Pro Tools users wanting to get pro-sounding virtual drums. To begin, Thomas shows you the ropes of programming a basic beat, getting your feet wet and familiarizing you with the basic concept of composing drum patterns. You’ll also learn key aspects of realism, such as making the parts playable and following common practices employed by real drummers. Then Thomas will show you how to get more detailed with your beat, adding velocity variation, applying different types of quantization, and more.


    Viewed 19254 By Music Producers & DJ´s.


  • Ozone 12 Mixing Explained TUTORiAL-FANTASTiC
    November 18th, 2025 ⚡
    Categories:

    Ozone 12 Mixing Explained TUTORiAL-FANTASTiC-MaGeSY

    Ozone 12 Mixing Explained®

    FANTASTiC | 17 November 2025 | 3.66 GB

    “Ozone 12: Mixing Explained” is aimed at producers, engineers, and mixers who want to use Ozone 12’s powerful tools to sculpt, balance, and enhance their mixes before mastering. In this video course, Larry Holcombe demonstrates how to bring clarity, punch, and width to your mixes with a suite of Ozone modules — from Stabilizer and Bass Control to Dynamic EQ, IRC4, and Vintage Tape. Whether you’re mixing electronic, rock, or pop music, you’ll learn professional techniques to make your mixes sound bigger, cleaner, and more cohesive. These videos are designed for users new to mixing with Ozone 12. The course begins with a focus on low-end management, where Larry shows how to use the Stabilizer and Bass Control modules to tighten and balance the bottom end without sacrificing punch. You’ll learn how adaptive tone shaping and focused stereo separation can bring clarity to kick and bass elements across any genre.


    Viewed 7687 By Music Producers & DJ´s.


MaGeSY TeleGram Subscribe & Stay up to date with all the Posts that are published in MaGeSY MaGeSY Podcast: Subscribe & Stay up to date with all the Audio Posts that are published in MaGeSY MaGeSY Instagram Official MaGeSY-Youtube Official MaGeSY-X Official MaGeSY-Facebook Official MaGeSY-Pinterest Official MaGeSY-WhatsApp Channel Official

With Adblocker the page loads slower & avoid enhanced new search


ಮ್ಯಾಜೆಸ್ಯ್